First setup of Turris Shield⚓︎
Connecting cables⚓︎
Turris shield has Ethernet ports split into two groups — WAN (Wide Area Network aka Internet) and LAN (Local Area Network aka your private network to be secured).

There is only one WAN port — the grey one, but you have four LAN ports available — the ones framed in blue.
You should connect the cable from your ISP to your WAN port. Your ISP might have provided you with some kind of modem (DSL, Cable TV, …), so connect your Shield directly into it.
If four ports for your secure home network are not enough, you can extend it using either switches or using Wi-Fi APs. But be aware, there is no password during initial setup, so we highly recommend to set up Shield before connecting other computers.
Important
Make sure you use proper Gigabit Ethernet cables, i.e., Cat 5e or Cat 6 straight unshielded twisted pair cables with 8 wires (8P8C) to connect your devices to the Turris as well as your Turris to the modem or another ISP device.
Entering guide⚓︎
Once you have all cables connected, you can power up your Shield by connecting the power supply. Wait for your Shield to boot up. During boot LED will shine red and once booted up, it will start blinking in heartbeat pattern (blink-blink-pause).
When booted, you can access the first-run wizard by using a web browser and entering as URL address of your router. Your router should be accessible on http://turris.local. In case zeroconf setup is broken on your PC, you can use IP address http://192.168.1.1 directly.
Guide walk-through⚓︎
As Turris Shield is trying to be as simple as possible without compromising the security, it will not allow you to access the Internet without setting up the password. That is the only mandatory step in the initial Guide.
Step one — password settings⚓︎
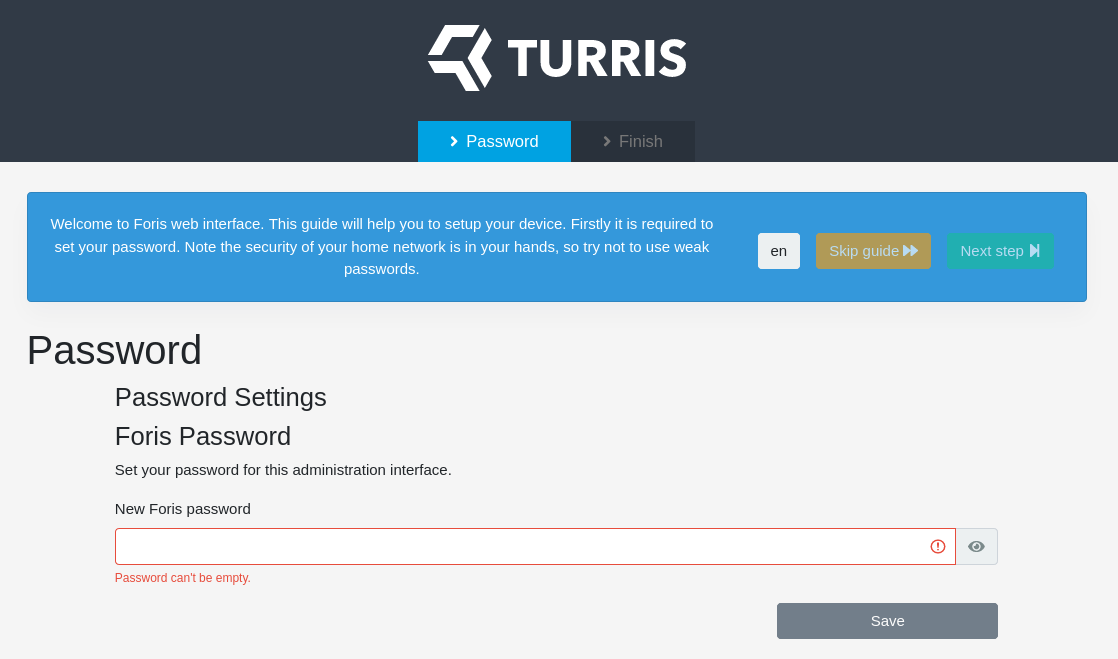
As mentioned previously, you are asked to enter password that will protect your administration interface. Pick something that is not easy to guess and long enough.
Step one A — Insecure password used⚓︎
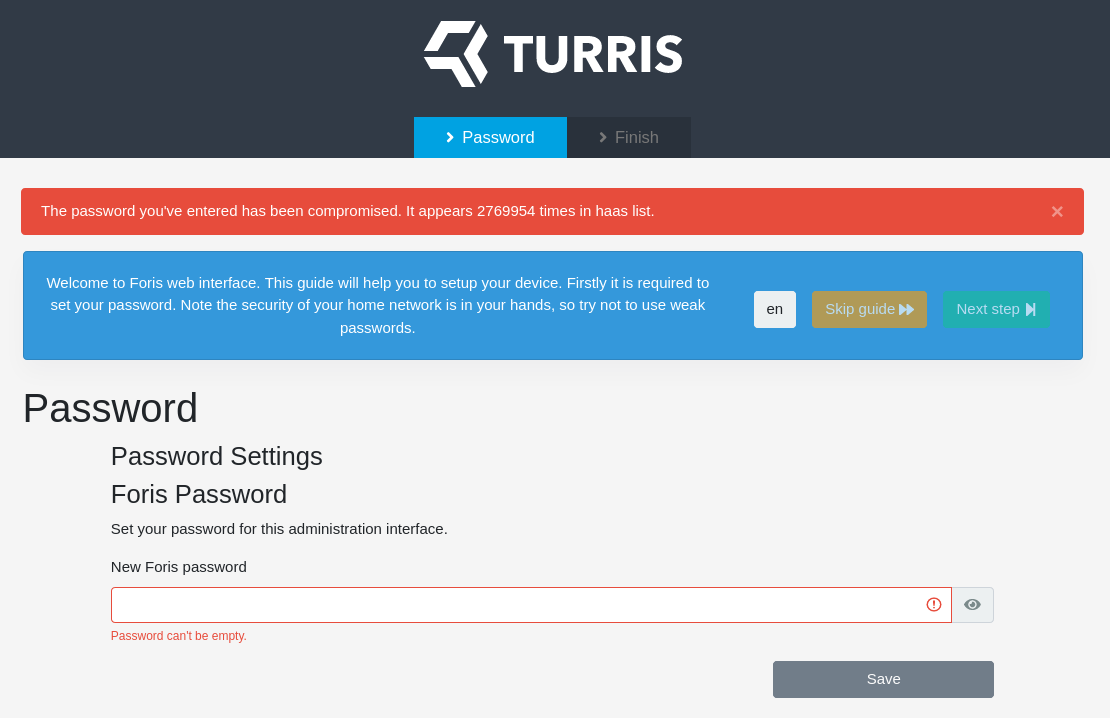
While setting the password, password is checked offline against set of well-known passwords that we captured in our honeypots. If you see the error above, the password you picked is definitely not secure and you should pick something else.
Step one B — Password set⚓︎
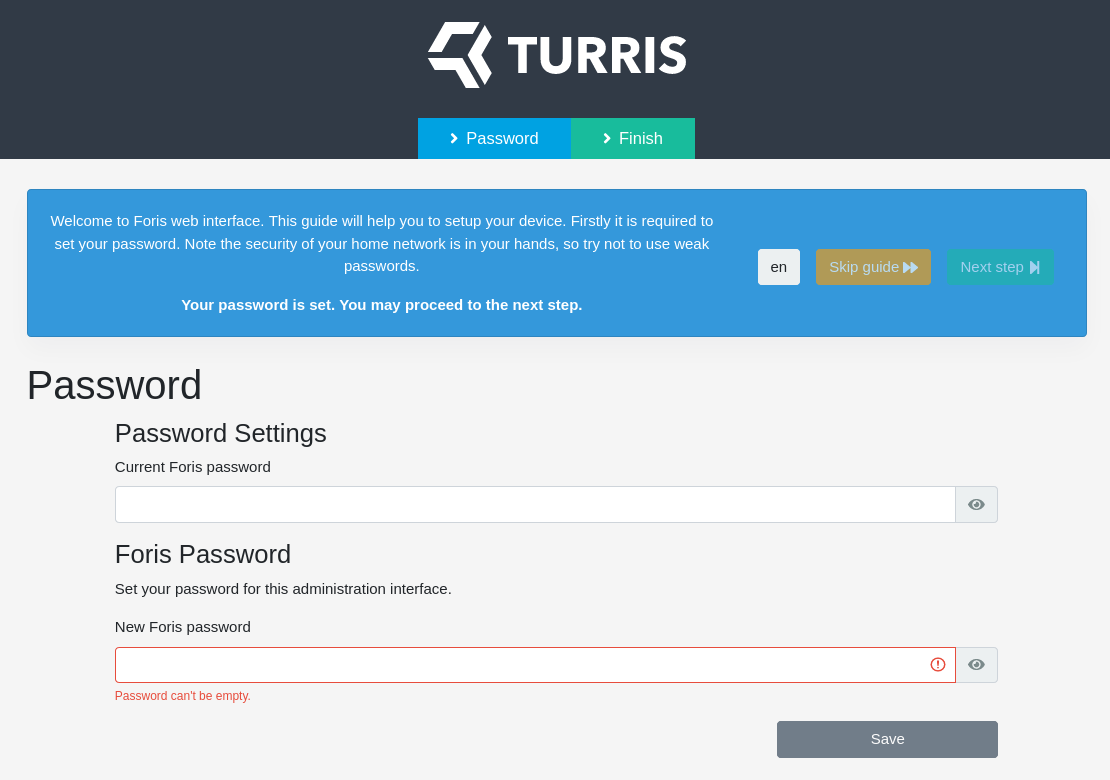
Once you choose non-blacklisted password that is long enough, it is set, and you may proceed to the next step via Next step button.
Step two — guide finished⚓︎
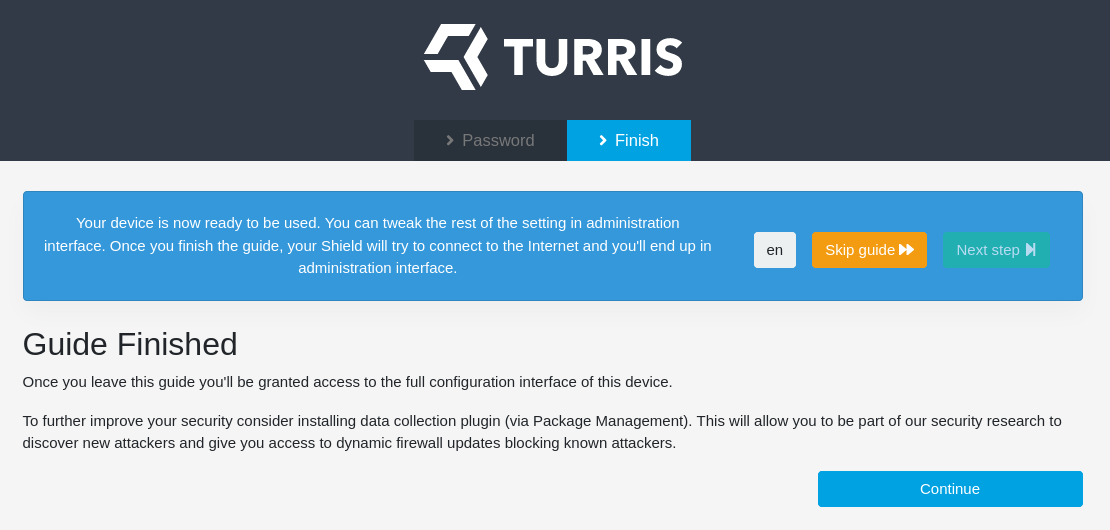
Second step is farewell message from the guide. Click on Continue button and you are done. Your internet should start working and you should land on the administrative interface. You can take a look at the screenshots, to see what is available.